


Create Tactile Animations in Procreate With Reece Parker


Hello, I'm Reece Parker, a self-taught animation director and illustrator.
Subscriber to the famed philosophy "fake it til you make it", my work leans towards hand drawn with dark color palettes, but I dive into briefs that range the full spectrum of 2D from bright, poppy corporate work to dark, scribbly personal work. Two sides to one coin really.
In this tutorial, we'll take a deep dive into my favorite tips and techniques for bringing still illustrations to life in Procreate. We'll start by sketching concepts and adding key poses before animating and adding textural details - all while keeping things organized so we don't lose our friggin' minds.
True Grit Tools & Apps Used:
✓ Rusty Nib 4 (The Rusty Nib)
✓ Noisy Nib (The Rusty Nib)
✓ Dead Sharp-Eye (Monomania)
✓ Pin Liner 0.1 - Medium Fill (Stipple Studio)
✓ Procreate
Software skill level:
We'll be using some Procreate tools that are more complicated than the basics, but if you have spent some time in Procreate and can draw shapes, use brushes and started to dabble in animation you should be good.

PART 01:
Start with an illustration and organize it like your life depends on it.
There are almost limitless styles of animation but for the purposes of this tutorial, we want to create an illustration that allows for simple but impactful animated moments that bring your work to life.

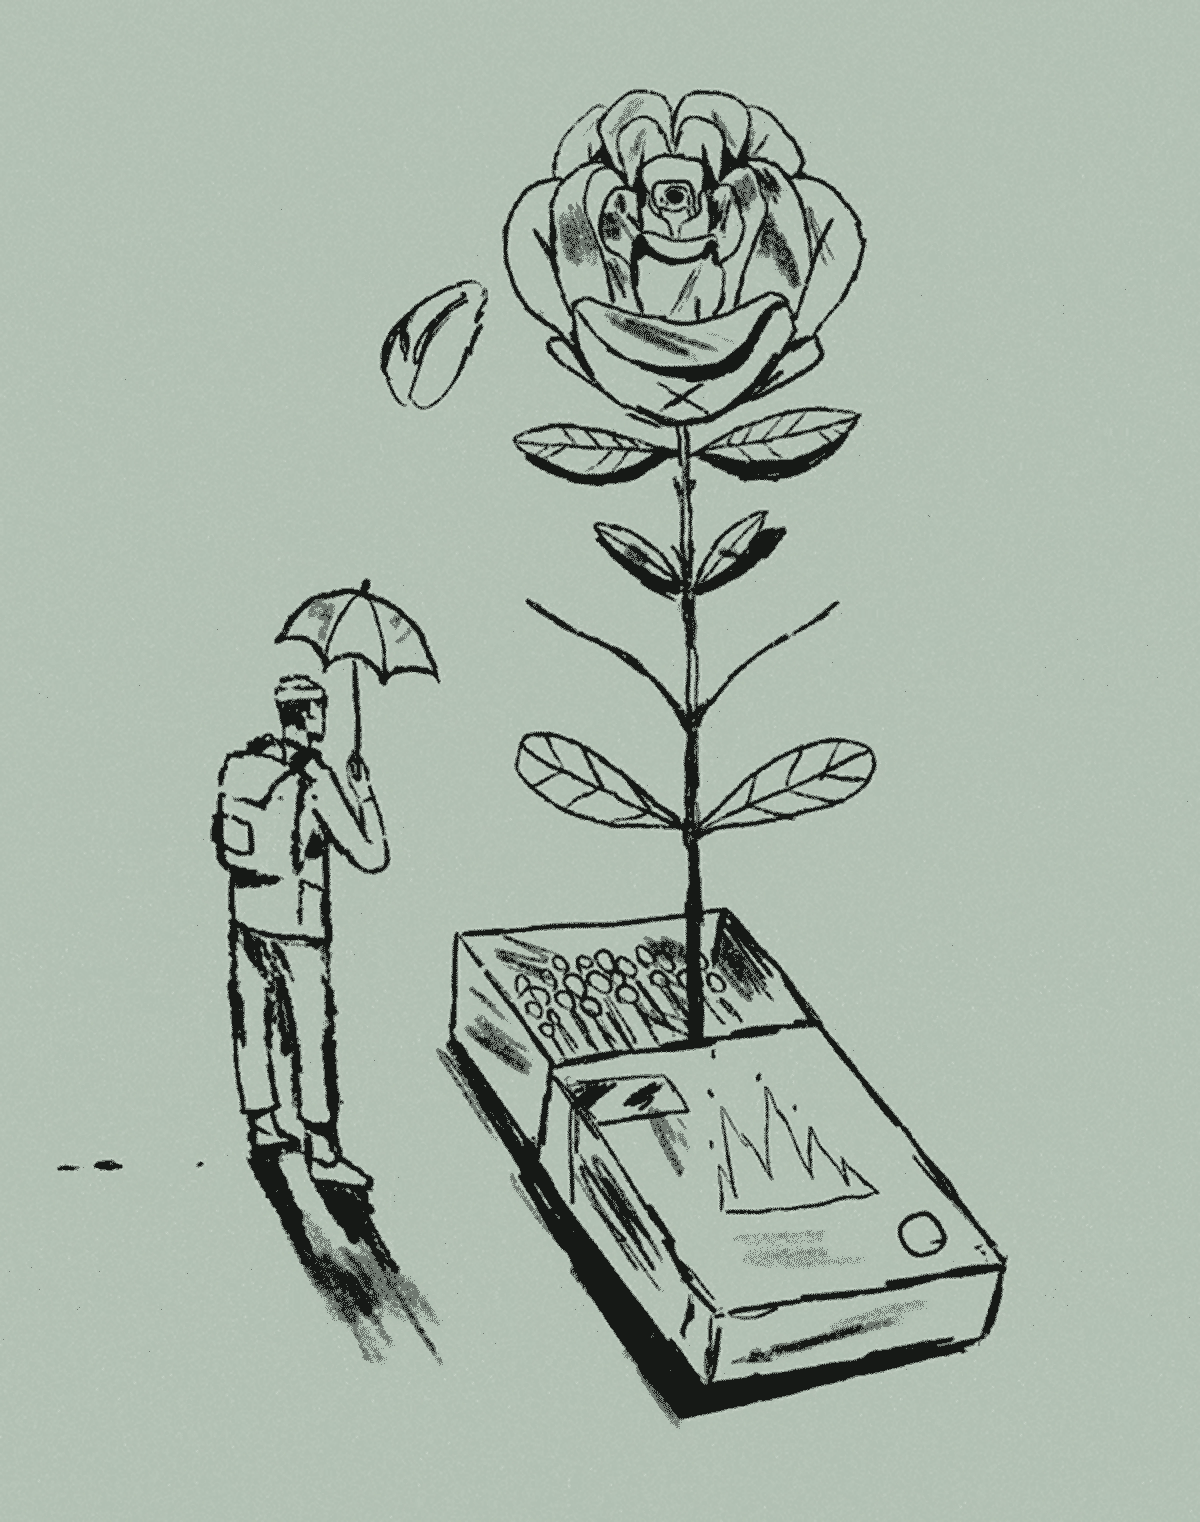
I'm really liking my sketch here. I can see a few opportunities to animate parts of the illustration without over-committing myself.
My plan is to animate a flower petal falling onto the umbrella, whilst the fire on the matchbox flickers. I'll also have the opportunity to animate my shadows and textures.
Illustrating with animation in mind:
Now it's time to flesh out my sketch with final linework and color. It's really important to keep your illustration organized so there's no clutter once we start animating.
• Separate any shapes and elements that will move onto their own layers.
• Name your layers and use them efficiently.
• Create a manageable color palette and stick to it.
• Minimize difficult-to-recreate shapes, masks, effects, gradients and textures.
• Keep layer groups organised

F**k around and find out.
Animation can get out of hand in hundreds of different ways. Layers, effects, colors, shapes, textures, labels, groups, timing & pacing; these things can so easily become hard to track, lost in translation, unorganized, and destroy your will to continue.
DISORGANIZED FILES AND LAYERS WILL BITE YOU IN THE ASS LATER - TRUST ME!
PART 02:
- Group your final illustration layers into one group and label it “01”.
- DUPLICATE this group,
- Merge the duplicate (not the original) into a single layer.
- Go to Actions > Canvas > turn on Animation Assist.
- Set the duplicated layer to the BG layer (see below).
- Keep your original grouped 01 illustration turned off for now, we will come back to that for “clean up”. While turned off, this will also not affect our animation playback.

PART 03:
Start Animating
Animation is just a series of drawings, but the final pass of an illustration takes time and consideration. For this reason, it's best to first start with a “rough pass” or “pencil pass”. This is essentially an extension of the sketching stage where we will map out the main steps of our animation.
Rough Pass 1 - Key Poses
The rough pass is an essential step in any good animation. “Key poses” refers to distilling down your animation/action to its most influential points, drawing those only, and ignoring the rest of the frames.
This exercise allows us to ignore the nitty gritty details for now, and start to really visualize the animation as a whole.
In the video above, you can see how something that might be 20 drawings, can be simplified down to 3 simple poses, which lay the foundation for the rest of the animation. Each new frame added duplicates the previous frame, allowing me to quickly erase and replace sections of the illustration to pose.
Here's the key poses for my illustration:
- Character standing with umbrella.
- Petal begins to fall off of rose.
- Petal halfway from rose to umbrella .
- Petal collides with umbrella like water.
- Character bent over to shake off the umbrella.
Rough Pass 2 - Inbetweens
Once you feel like your “Key Poses” are fleshed out enough to properly represent the action in your animation, it's time to move on to “inbetweens”.
Inbetweens refer to the drawings that will live between our key poses. These frames will fill in the gaps in our animation, and smooth out the action considerably.
Pro Tip: Get to know The 12 Pillars of Animation.
These 12 pillars build the foundation of all animation. These reference reality and distill those real-life principles into achievable techniques you can use to make your animations lively and interesting.
Use onion skins!
Onion skins act as a reference, allowing you see which frame is behind and which frame in front of your current drawing. This helps us draw our current frame with accurate shape and volume, relative to our previous frames whilst avoiding unwanted popping and glitches in our animation.
Now that the ‘inbetweens’ have been added to the animation, you can really start to understand the exact action and movement in the sequence. The blockiness and ‘guessing’ is removed and replaced with a nice flow, as we have literally drawn each frame ‘inbetween’ our main key poses.
You can add as many or as few inbetween frames as you would like to. From here now we can start adding color and details, more commonly known as “Clean Up”.

PART 04:
Time to clean up
Clean-up is the act of taking our finished rough animation and adding color, linework, texturing, and all the finishing touches necessary to bridge the gap between our rough animation and our finished illustration.
If all goes well, the cleanup should be up to the same quality and attention to detail as the original illustration.
Tip: float a reference illustration over your layers while you clean up.
I use a merged or flattened copy of my final illustration as a ref throughout the clean-up process (set to REF or BG in the timeline so it doesn't interrupt the sequence).
Sometimes our REF works best behind or in front of your clean-up layers on a low opacity. Other times it's helpful to turn the opacity back up, scale it down, and drag it to a corner of your canvas (like shown below). Depending on which portion you are working on at the time.

Rinse and repeat.
From here, it's the same process for each additional frame in our ROUGH pass animation!

- Duplicate the previous frame group after you are finished editing it, with all layers intact and unmerged/flattened
- Rename it according to the corresponding frame (01 → 02 → 03, etc.)
- Color / clean / texture following your rough frame, and your REF illustration to guide you.
THIS PROCESS CAN BE TEDIOUS AND REPETITIVE SO IT HELPS TO TAKE MULTIPLE PASSES THROUGH EACH FRAME, TACKLING A DIFFERENT PROCESS EACH TIME
- Take a first pass filling in all the blocks of solid color (1)
- Take another pass to refine your linework (2)
- After that, the detail pass (3)
- After that, the texture pass (4)

This both speeds up the process overall (you don't have to swap out brushes colors and textures between each frame) and also helps prevent you from completely losing your mind. 🧠
Playback
Make sure to playback your animation frequently along the way, to ensure detail and consistency are being met throughout. You may notice more jitter or popping than you hoped, this is a result of varying volumes in your shapes from frame to frame. This is difficult! Repetition is the key to becoming faster and more accurate in this process.
Help! Maximum layer limit reached!!!

One of Procreate's pitfalls is that it can only handle so many layers and the layer limit is dependent on your iPad's processing power and RAM (check here). The size of your canvas can drastically impact this limit as well.
WORKAROUND: once you finish frames entirely, you can begin to merge layers down, or combine layers (don't group). This helps keep the number of layers within each group (or frame) limited, and allows us to continue on our clean-up path.

⚠️ EXERCISE CAUTION: combining layers should not be taken lightly, we must first be very sure our “frame” or outermost group is finished editing. If you're on a merging layers mission to free up space in your clean-up process, make sure you keep your latest “Frame” (or group) intact with all layers so that when you duplicate to continue to clean up, you have all available layers to edit.

PART 05:
Adding a texture overlay
I like to add a bit of stylized “grit” and “noise” to my animation. It’s always best to do this step last, during the clean-up stages.
I used the “Pin Liner 0.1 - Medium Fill” Brush from True Grit's Stipple Studio pack to add a nice speckle texture on the top layer of each frame group.
You can see that the texture “dances” or “jitters” throughout the animation. This is a style choice and is simply created by shifting the position, size, or general volume/shape of the blue speckle layer Per-Frame.
PART 06:
Exporting
Once you are happy with your animation, export to your preferred setting and show the world. I use Mp4s for Instagram and gifs for my website. Procreate handles both these exports well. You can also export as a PSD if needed, this can be helpful as well depending on your goals.


Thanks for hanging out, hopefully something here was useful. Animation is no joke, but starting small and building up to more ambitious ideas is the key to keeping at it. Keep practicing, and be nice to yourself along the way. If you have questions, I’m always around on Instagram sharing tips and thoughts. Cheers!

More about Reece Parker
Website | Instagram | Select Clients


